While scaling my car, the frame dimension that fit the best was 2.5″ x 1″ rectangular tube. Our local metal supplier did not carry that size and the special delivery to acquire that size was too expensive for me. So I had to either go up to 3″ or downsize to 2″.
As weight is going to be an issue for this large cyclekart, I chose 2″ as it saves nearly one pound per foot over the larger 3″ size tube.
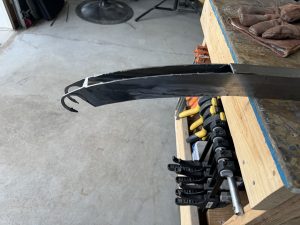
It never ceases to amaze me how much time metal work takes. The two rails took nearly two weeks. While somewhat simpler than my first Bugatti Type 13 project, these rails still had a lot of detail work. One improvement I made was the front spring connection where I used pipe. It came out a lot cleaner and stronger.
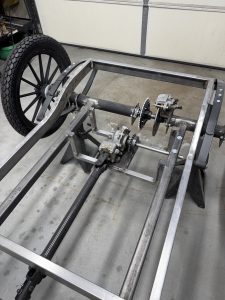
The rear 1″ axle is 53″ long and purchased from BMI. They do custom axles and I could not be more pleased with their fast response and perfect parts. The axle is supported at each end by 2″ pipe that have bearing mounts welded at each end.
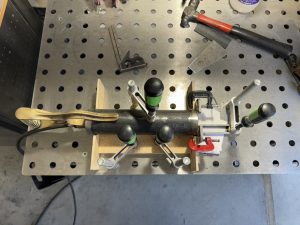
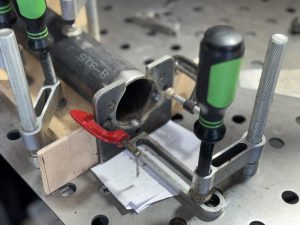
Here is a picture of my wooden jig so that the bearing end plates are mated to the pipe precisely. The new Harbor Freight welding table with clamping fixtures is a godsend for fitting everything perfectly before welding. The rear axle pieces took me a full day to complete. A lot of work indeed, but so satisfying to see how well they perfectly aligned in the final assembly.
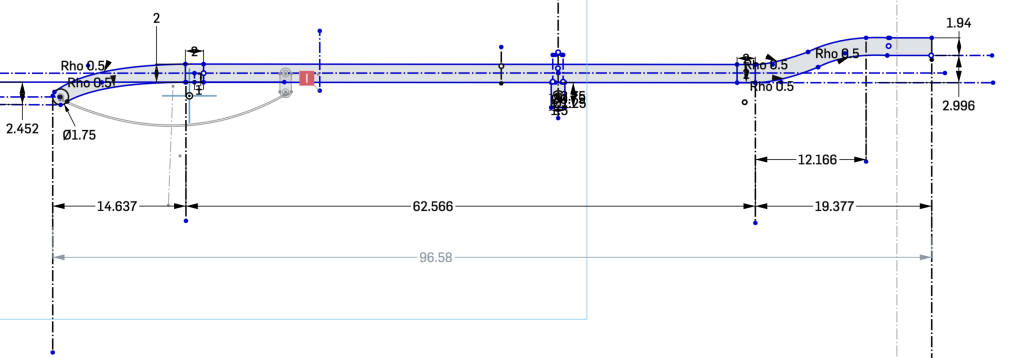
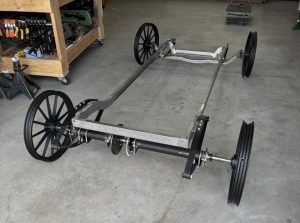
Here is the rear axle fully assembled and connected to the suspension springs. My CAD drawings helped a lot to figure out the overall length and spacing needed between the components. It’s simply wonderful to see the final product meet the drawings perfectly.
The rear springs were purchased from Engles Coach Shop. They are the 1-1/4″ Wagon Seat Springs. The pair cost me $203 with shipping.
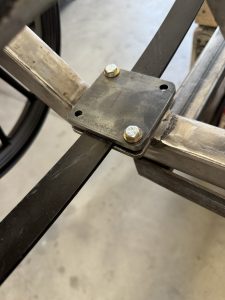
I did not modify them in anyway. I simply welded a large 2×2 angle onto the frame then mated the springs via three bolts.
I located the springs per the pictures of the actual car. In retrospect, I wished I had lowered the springs one inch. They are strong and work very well for this application.
The front spring mounting is fairly straight forward. The forward connection point is set by the frame design. The rear mounting; however, requires some calculation. Refer to my Bugatti build to see how to calculate the correct rear mounting point. Steve Vinson’s method did not work for me on the Bugatti, so I did a little investigation and discovered a formula that locates the precise spot. It allows the spring to work prefectly.
To mount the front axle, I welded a 4″x 4″ pad across the top side of the axle where the front elliptical springs would be located. Then once the springs were installed, I sandwiched them between the mounting pads and bolted them into place.
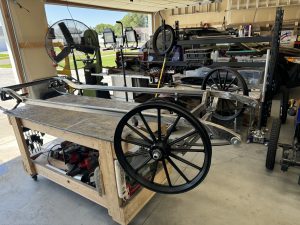
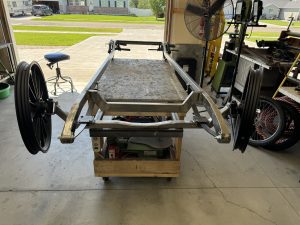
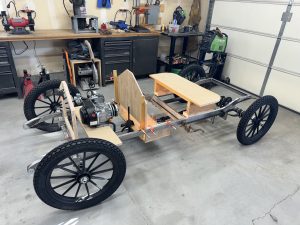
Here is my frame mated with my front and rear axle. I also put on the wheels for a quick look to see how it looked. I had problems with my right rear wheel as it didn’t go onto the axle completely. The wheel bearing was not set perfectly so it was a pretty quick fix.
It’s very rewarding when it’s assembly time and I get to see all the hard work come to fruition.
The swing arm assembly is the most technical part of this entire build. While I have the basic premise worked out with CAD, I worked out most of the details through trial fitting and discovery while doing the build.
The rear end of the swing arm supports a Polaris 500 front gear box which worked great. Steve Vinson mounted his engine in this location. The axle is part of the swing arm so the chain connection between the gearbox (or Steve’s motor) remains a constant length. This design affords excellent rear end suspension which will be greatly appreciated. My Bugatti has no rear suspension and can be very hard on this old body of mine.
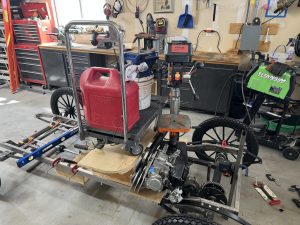
Here is a picture of me testing my weight on the suspension to see how well it was going to work out. Man it took a lot of very heavy stuff to simulate my weight. I need to go on a diet!
The suspension passed the test with flying colors in this static test. Unfortunately, once I started test driving I discovered heavy bumps would bottom out my rear fender support framework, something I had not considered in this initial test. So at some point in the not-too-distant future, I think I’ll add some coiled springs to give it a little more cushion.
With the frame basically complete, I was overly eager to situate the seat, firewall, engine, and radiator to see how well the design was going to fit my big carcass. It was going to be a tight fit (as expected) but within the initial parameters of my design. It’s starting to really take some character and shape now.