The signature piece of Bugatti is the identifiable horseshoe-shaped radiator. All vintage cars (and many today) are immediately recognizable by the radiator. The Type 13, Brescia Bugatti is no exception.
As seen in this picture, the radiator is quite a masterpiece of workmanship with its all-brass construction and copious use of curves.
It’s my intent to build my cyclekart radiator to reflect the original classy design as close as practical. There are some clear obstacles I need to overcome including:
Brass is very expensive and not practical for me, so I need to consider an alternative means for creating the shiny brass appearance. I found a gold metalic spray can paint that does a very good job. Another option is either anodizing or powder coating. A last option would be to do a vinyl skin wrap.
Bending the metal to create a seamless, unified radiator without welded or joined edges is going to be really hard.
Recreating the front screen to visually appear as hexagon-shaped cooling fins.
Creating a radiator cap to the shape and style of the original.
In the following sections, I will address each issue as I progress.
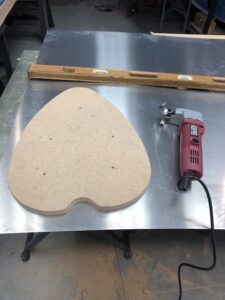
My radiator buck forms completed, I’m ready to cut my first aluminum on this project.
October 22, 2022
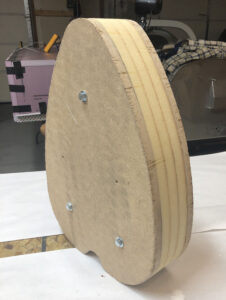
I started work on the aluminum radiator. From my full size plans, I cut out the shape and transferred it to two pieces of mdf wood. I used my new Harbor Freight jigsaw and it did a wonderful job of cutting both wood pieces. I then stacked the two on top of each other, screwed them together and sanded the edges using an orbital sander with 60 grit sandpaper so they exactly matched each other. Next, I drilled and bolted the two pieces together with a sheet of 0.040 aluminum sandwiched in between. I was extremely disappointed in my new electric shear from Harbor Freight. I perhaps need to adjust them further. Needless to say it jammed all the time while my curses flowed flawlessly.
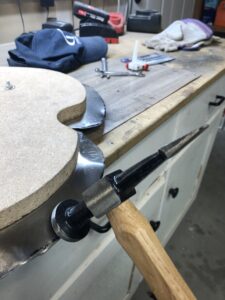
I got my new flat pein-type hammer yesterday so I began slowly forming the 1″ metal around the edge of the form. After a while, it became clear that there simply was too much excess material. I either need to cut notches or consider buying a shrinker. The shrinker & stretcher from Harbor Freight is $160! I really wanted to make this a clean bend without any relief cuts in hopes I can simply apply a nice powder coat paint as I cannot use any body filler. So the jury is still out on how I will proceed.
Nov 1
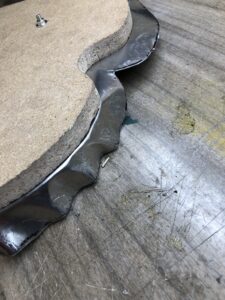
After some more thought, I cut the bent flange back to about 1/2″ and was able to cleanly shrink and stretch the metal around the buck.
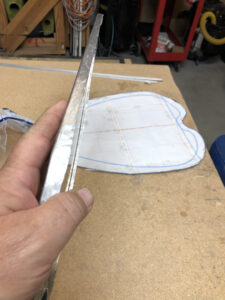
I next tried Alumaweld from Harbor Freight on a piece of scrap metal. I hoped to braze a 2.5″ aluminum strip around the entire perimeter of the radiator by brazing it to the bent edge. I learned it was pretty hard to get the metal up to 370 degrees as required unless I concentrated the flame from my little propane torch to a very small area of about 1″. Once I got that working I laid in the Alumaweld pretty nicely. But once I sanded it to where it blended the two pieces into a seamless edge it came apart real easily. So after spending many days on a metal radiator, I decided to switch to a composite design.
The buck and nice flat edge pein hammer make bending the .040 thick aluminum pretty easy.
Forming the radiator is proving more difficult than first imagined. The 1″ flange is too much material to successfully shrink around the compound curves.
Cutting the flange back to 1/2″ was the trick. I was able to shrink and stretch the material around the compound curves very successfully.
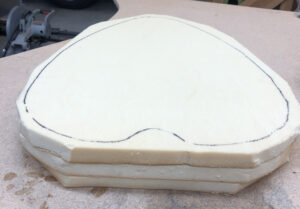
Three layers of 1" thick high density foam
Nov 5
Today I started working on my fiberglass radiator build. Fortunately, I have the two buck mdf pieces ready from my earlier metal build attempt and also a sheet of 1″ Divinycell foam. I also have plenty of fiberglass cloth left over from my previous Long-Eze airplane build over 25 years ago so materials cost is going to be next to nothing. I also have plenty of resin on hand so I just need to get on with it.
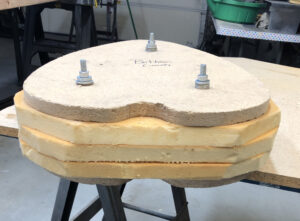
I rough cut three 1″ foam pieces and stacked them together with glue and then sandwiched them between the two bucks. I used three, 6 inch bolts to hold it all together.
To carve the foam to shape I am going to use a hotwire foam cutter I built yesterday. See hotwire cutter build to learn more.
Hotwire cutter and a little sanding worked out well
Backside layup
Front & back layups done
Side profiled and groved
Layup Completed
Nov 11
I received the more powerful power supply from Amazon today for my newly built hotwire foam cutter after my initial power supply proved underpowered. Here is the result after cutting and only a minute or two of sanding.
Nov 19
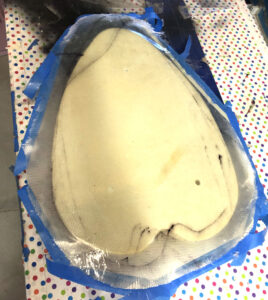
After perfecting my composite curing box and acquiring some more fiberglass and hardener, I proceeded with my first layup.
The first thing I had to do was cut off 1/2″ across the entire face of the foam so it measured 2-1/2″ thick. I did this easily enough with my wire cutter and about 30 seconds of sanding with my large sanding block.
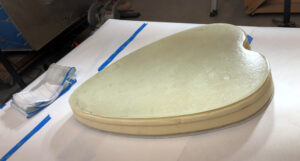
I decided to do the radiator in three layups, first the back, then the front, and finally the sides. Each layup will simply consist of three layers of BID. Once the front and back are cured and cut to size, I will route out grooves in the remaining side foam about 3/8″ wide and deep around the front and back perimeter so I can apply flox to create hard sharp corners. Flox is simply cotton mixed with epoxy. The stuff gets really hard and is not fun to sand. Fiberglass does not like bending 90 degrees very easily, so the flox corners will facilitate hard and sharp corners.
The first fiberglass layup turned out pretty good. My composite curing box really did the trick despite the outside sub-zero temperature and very low garage temps we are having at night. Now to trim the sides and then repeat another layup on the front. I decided to run two bolts through the bottom part of the radiator so it can attach to the chassis. I will epoxy the bolts in place and the heads hidden and buried in the foam with flox so they are rigid. I think this will make for a very rigid mount.
This radiator mounting idea came to me just this morning. You’ll note, I did not create my entire Bugatti design in Fusion 360; just the main outline and positioning of major components. Then as I build, I adjust as necessary and figure out things as I go. I enjoy knowing that my overall layout design is working yet maintaining the creative freedom to build the details as I approach each part of the build. How exciting!
Nov 25
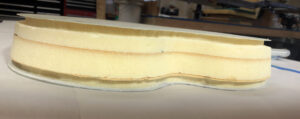
Once the front and backside layups were completed, I installed the radiator onto the car and ran a straight edge line from the instrument panel to the radiator to determine the profile angle. The radiator profile was not a straight 90 degrees but angled downward so the front side of the radiator was slightly smaller than the back. Once I figured that out, I cut the front and reshaped the sides to the proper angle all around the perimeter. I next cut out the groves to accept the flox to create the sharp hard corners.
I built a small jig to hold up the radiator vertically so I could fiberglass the sides. I did this in two steps; once side then the other as it was more convenient.
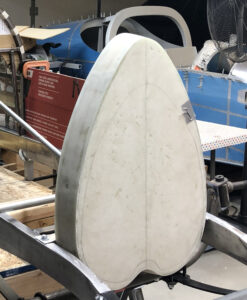
I could not be more pleased with the end result, the shape is perfect with nice very sharp hard corners.
The next step is creating the front grill, but that will wait until after Christmas.
Radiator Cap
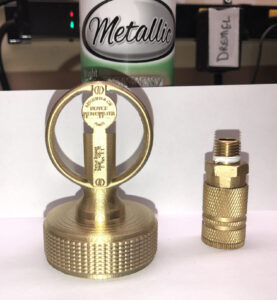
I plan on 3D printing this with my Ender Pro 3 printer. While in Houston visiting my son earlier this year, he created the design from pictures using Blender. We incorporated all the same detail right down to the very tiny wording on the front and back.
We then printed it using just PLA plastic material which is in many ways the easiest material to print. I will reprint using ABS which is more difficult to print but it has a much higher temperature specification needed to endure hot days outside. The PLA would simply melt.
The print came out fantastic including the small print. I was so excited, this was in fact the very first part on this build, even though its just the prototype.
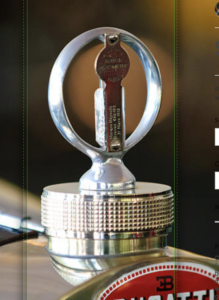
Once I got back to my home in Idaho, I tried out the Gold Metallic spray paint to see how well it compared to brass. I was astounded, the resemblance is almost perfect. See the picture where I set a brass airhose fitting next to the cap. You cannot distinguish one from the other, the material appearance is a perfect match!
This little experiment let me now that if other finish methods failed, this one would work just fine.
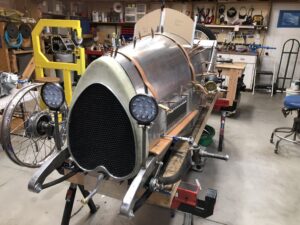
April 20, 2023
I built the radiator grill by shaping a piece of 1/4″ plywood then painting it black. I purchased plastic chicken coup fencing because it had octagon shaped patterns, was light, and cheap. I then spread a liberal layer of epoxy of the plywood and placed the coup netting on top. I placed a small piece of wood on top of the netting and then added weights to keep it flat. After cooking in my composite curing oven for many hours it was done and looked great.
I used thin aluminum strips I bought form Lowes and bent them around the radiator grill. As the strips were too short to go all around the grill circumference, I had to make it out of two separate strips. I tried brazing them together using Alumaweld rods from Harbor freight but it did not hold well. So I basically glued the aluminum strips to the side of the thin plywood edges using epoxy. As feared, it too did not hold perfectly, so I added some two minute quick weld epoxy to the inside along a few points around the perimeter. Fortunately that held. I then used three small, black colored screws to attach the grill to the radiator body. Once the radiator body is painted, I will glue the grill back on using a good coat of epoxy.
I am pleased with the outcome. This took a lot of work and effort, but it really looks fantastic. Once I have the radiator cap installed and its all painted, it should look pretty awesome.